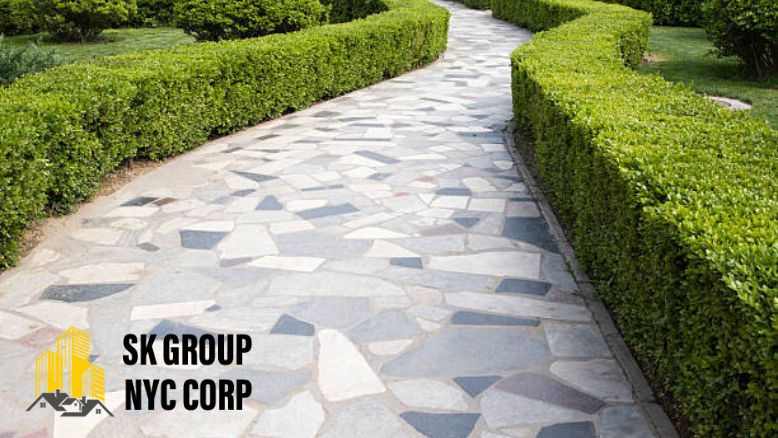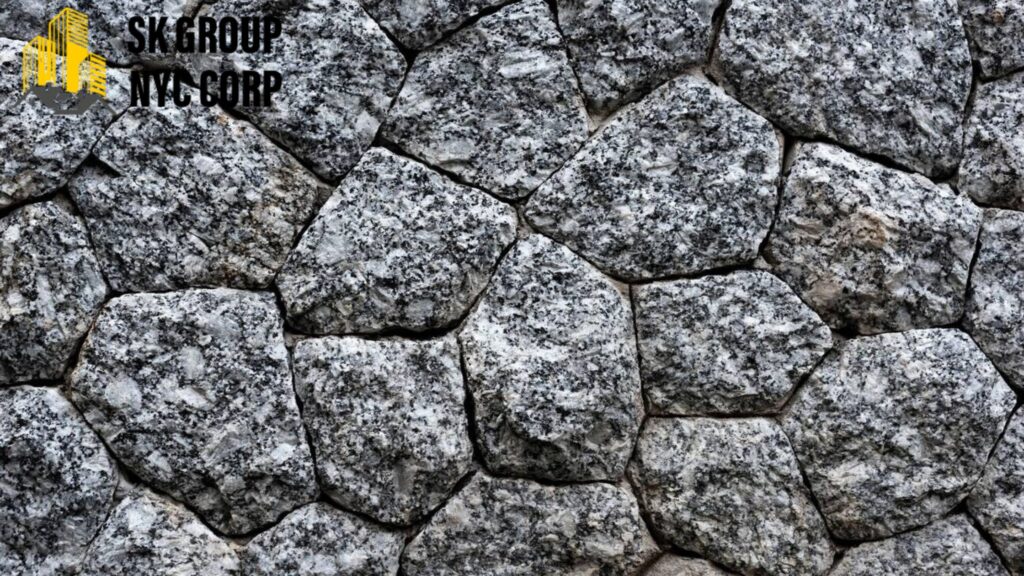
Few home improvement projects offer the immediate, dramatic return on investment both visually and financially of a stacked stone accent wall. The rugged texture, depth, and timeless elegance of stone veneer stacked stone can completely redefine a space, transforming a flat, uninspiring room into a warm, textural focal point.
Modern manufactured stone veneer is a triumph of construction technology. It provides the aesthetic weight and authenticity of natural quarried stone but is significantly lighter, more versatile, and far easier to install. While the results look like the work of a seasoned mason, the installation process is surprisingly accessible to the capable DIYer who possesses patience, attention to detail, and a methodical approach.
This comprehensive guide, updated for current best practices in 2026, will walk you through every stage of the installation process. We have consulted with the field experts at SK Group NYC Corp to provide professional-grade insights that will ensure your project is not only beautiful but structurally sound and durable.
Why Choose Stacked Stone Veneer?
Before picking up a trowel, it is helpful to understand why adhered manufactured stone veneer (AMSV) has become the preferred choice for professionals and homeowners alike over the last decade.
- Weight Advantage: Manufactured stone is typically less than half the weight of natural stone. In many cases, it can be applied directly to existing wall structures without requiring additional footings or structural reinforcement.
- Design Versatility: Because it is lightweight, it can be installed on interior walls, around fireplace surrounds, on exterior facades, and even on ceilings, provided the substrate is properly prepared.
- Ease of Installation: The individual units or panels are designed to fit together tightly, often eliminating the need for traditional mortar grouting (the “dry-stack” look), which significantly speeds up the process.
- Cost-Effectiveness: Material costs are generally lower than natural stone, and because the installation is faster and requires less structural engineering, overall project costs are reduced.
Phase 1: Planning, Tools, and Material Estimation
Preparation is the cornerstone of any successful masonry project. Rushing this phase leads to material shortages, structural failures, and aesthetic frustrations.
Estimating Your Needs
Accurate measurement is critical. AMSV is sold in two distinct types of units:
- Flats: Sold by the square foot. Measure the total height and width of the area you intend to cover. Multiply these numbers to get the total square footage.
- Corners: Sold by the linear foot. Measure the total vertical length of all outside corners. Corner pieces are designed to wrap around the corner, typically providing a 4-to-6-inch return on each face.
Crucial Advice from SK Group NYC Corp: Always add a 10% waste factor to both your flat and corner measurements. This accounts for cuts, breakage during handling, and the inevitable pieces that are trimmed too small to be usable.
Essential Tools for Stone Veneer Installation
Having the right tools ready before you mix the first batch of mortar will keep the workflow smooth and professional.
Safety Equipment:
- Heavy-duty work gloves
- Safety glasses
- N95 respirator mask (for cutting dust)
Layout and Prep Tools:
- 4-foot level and torpedo level
- Chalk line
- Tape measure
- Staple gun (for attaching lath)
- Tin snips or angle grinder (to cut metal lath)
Mixing and Application Tools:
- Large mixing tub or 5-gallon buckets
- Heavy-duty drill with a mixing paddle (auger style works best)
- Pointing trowel
- Margin trowel
- Notched trowel (3/8-inch or 1/2-inch square notch, depending on stone type and mortar recommendations)
- Grout bag (if grouting joints is required)
Cutting Tools:
- Angle grinder equipped with a continuous-rim diamond blade (essential for tight cuts)
- Wet tile saw (optional, good for cleaner cuts on flat panels)
- Masonry hammer and chisel (for snapping pieces and texturing edges)
Phase 2: Surface Preparation and Substrates
The substrate is the existing wall surface you are covering. The preparation method depends entirely on what that surface is made of.
Important Note on Moisture Management (Exterior Applications): If you are installing stone veneer on an exterior wall, moisture management is paramount. You must install a weather-resistant barrier (WRB), such as asphalt felt paper or a high-quality synthetic house wrap, over the sheathing, followed by a code-approved weep screed at the bottom edge to allow trapped moisture to escape.
Substrate A: Raw Concrete, CMU (Block), or Cement Board
If your substrate is masonry (concrete, brick that has not been painted, or stucco) or a cement-based backer board (like Durock or HardieBacker), preparation is minimal.
- Clean the Surface: The surface must be structurally sound, clean, and free of dust, oil, paint, or efflorescence (the white powdery salt that leaches from concrete). A pressure washer or stiff wire brush may be necessary.
- Check for Adhesion: If the concrete is very smooth or dense, it may be too slick for mortar to get a mechanical bite. SK Group NYC Corp recommends either mechanically abrading the surface (sandblasting or vigorous bush-hammering) or applying a concrete bonding agent designed to prepare the surface for thin-set mortar.
Substrate B: Painted Brick, Drywall, or Plywood (Interior Applications Only)
You cannot apply mortar directly to painted surfaces, standard paper-faced drywall, or wood paneling. These surfaces will either delaminate under the weight of the stone or prevent the mortar from curing correctly.
- Over Drywall/Plywood: You must install cement backer board (CBU) over the existing wall surface. Fasten the CBU with corrosion-resistant screws every 6 to 8 inches into the studs.
- Over Painted Brick: You must mechanically fasten diamond metal lath to the brick using concrete screws (Tapcons) with fender washers, ensuring penetration into the mortar joints where possible.
Phase 3: The Scratch Coat Application
The scratch coat is arguably the most critical step for ensuring a permanent bond. It creates a roughened, mechanical key that holds the heavy stone veneer to the wall.
- Attach Metal Lath (If required): If you are working over CBU or painted brick, you have already attached the lath. If you are working over raw CMU or concrete, lath is generally not required, but check your specific stone manufacturer’s guidelines.
Professional Tip: Always install metal lath so that it feels rough when you run your hand upward; it should catch on the downward stroke. Overlap seams by 1 inch vertically and 2 inches horizontally. - Mix Mortar: Use a high-quality, polymer-modified thin-set mortar that meets ANSI A118.4 or A118.15 standards, or a specialized adhered veneer mortar (AVM). Mix it in a 5-gallon bucket using your paddle mixer until it reaches a smooth, consistent, “peanut butter” texture. It should be firm enough to hold a notch but wet enough to spread easily.
- Apply the Coat: Using the flat side of your notched trowel, firmly press the mortar into the metal lath, forcing it through the mesh to completely encase the wire. Ensure 100% coverage of the substrate.
- Scratch the Surface: Immediately go back over the wet mortar with the notched side of your trowel, holding it at a 45-degree angle. Create deep horizontal ridges across the entire surface. Before the mortar sets, use a masonry scarifier or the edge of your notched trowel to drag vertical lines through the ridges. This cross-hatching maximizes the surface area for the final bond.
- Cure: Allow the scratch coat to cure undisturbed for at least 24 to 48 hours. This layer must be hard before you attempt to hang the stone.
Phase 4: Installation of Stone Veneer Stacked Stone
This is where artistry meets technical skill. Taking your time in this phase will result in a professional-grade finish.
Step 1: Layout and Sorting
Never install stone veneer directly from a single box. Manufactured stone is produced in batches, and colors can shift slightly from one box to the next.
- Open at least 4 to 5 boxes simultaneously.
- Dump the stones out onto a clean tarp or workspace.
- Mix the stones thoroughly, blending variations in color, texture, and size. This prevents color blocking and ensures a random, natural appearance in the finished wall.
- Identify “corner pieces” and set them aside for the next step.
Step 2: Starting from the Bottom Up
Gravity is your enemy in masonry. Always start your installation from the bottom and work your way up.
- Establish Your Base Line: Use a 4-foot level and a chalk line to snap a perfectly level horizontal line at your starting point (e.g., the top of your fireplace hearth or the floor line of an accent wall).
- Install a Ledger Board: Screw a straight 1×4 board or a metal track securely into the studs along this chalk line. This ledger board is essential; it supports the weight of the first course of stones while the mortar sets overnight, preventing the entire wall from sliding down.
Step 3: Buttering and Setting the Stones
The experts at SK Group NYC Corp emphasize the full-coverage buttering method. Do not use the “spot bonding” method (placing globs of mortar on the corners and center of the stone). Spot bonding creates voids behind the stone where water can collect, freeze, and cause the veneer to fail prematurely.
- Moisten the Scratch Coat: If the scratch coat is extremely dry or if you are working in hot, dry weather, lightly mist the surface with clean water using a spray bottle. The wall should be damp, not soaking wet. The goal is to prevent the dry wall from sucking the moisture out of your mortar too quickly, which causes a weak bond.
- Apply Mortar to Stone: Butter the entire back of the stone veneer with the same polymer-modified mortar you used for the scratch coat. Use the notched side of your trowel to apply a consistent 1/2-inch bed of mortar, ensuring 100% coverage up to the very edges.
- Set the Stone: Press the stone firmly against the scratch coat wall. Apply pressure and use a slight side-to-side wiggling or twisting motion to collapse the mortar ridges and eliminate all trapped air pockets. You should feel the mortar squishing out around all four edges of the stone.
- Check for Level: Immediately place your torpedo level on the top edge of the stone to ensure it is plumb and level. It is far easier to adjust one stone now than to try and fix an entire crooked course later.
- Install Corners First: If your project involves outside corners, always install the corner pieces first. Alternate the long and short legs of the corner pieces as you stack them upward to create a randomized, natural bond pattern.
Step 4: Staggering Joints and Fitting
- Stagger Vertical Seams: Just like installing hardwood flooring or brick, you must stagger the vertical joints of the stacked stone. Never allow vertical seams to align for more than two consecutive courses. This creates a stronger wall and a more pleasing aesthetic.
- Field Cutting: Most stacked stone veneer is designed for a tight, mortarless fit. This requires precision cutting. Use an angle grinder with a high-quality diamond blade to trim stones to fit tightly against corners, outlets, or adjacent stones.
- Tidying Up Edges: When you make a field cut, you lose the natural, tumbled edge of the stone. To restore a natural look, use a masonry rubbing stone or nip the sharp edge with your pliers to ease the corner, making the cut look naturally fractured rather than saw-cut.
Step 5: Let it Set
Once you have installed the first 3 or 4 courses (up to about 2 feet high), stop and let the mortar cure for at least 24 hours. The weight of the stone above can cause the lower courses to shift or sag if the mortar isn’t sufficiently set. Resist the urge to finish the wall in a single day.
Phase 5: Grouting and Finishing (If Applicable)
Stacked stone veneer is famous for its dry-stack look, where the stones fit together so tightly that no mortar joint is visible. However, certain profiles or specific local building codes (especially for exterior applications in freeze-thaw climates) may require grouting the joints.
Option A: Dry-Stack (Mortarless) Installation
If you are using a stacked stone panel system or individual stones designed for a tight fit:
- Tightly Abut: Ensure each stone is pressed tightly against its neighbor, hiding the vertical seams.
- Clean as You Go: This is the golden rule of masonry. If mortar gets on the face of the stacked stone, wipe it off immediately with a damp (not wet) sponge. Once mortar cures on the textured surface of manufactured stone, it is nearly impossible to remove without damaging the finish.
Option B: Grouting with a Grout Bag
If your project requires grouting the joints between the stones:
- Choose Your Grout: Use a sanded mortar mix specifically designed for masonry veneer pointing. Select a color that complements or contrasts with the stone, as desired.
- Fill the Bag: Load the wet grout mix into a heavy-duty vinyl grout bag. Snip the tip to an appropriate size for your joint width (usually about 1/2 inch).
- Inject the Grout: Squeeze the grout deep into the joints between the stones, ensuring the voids are completely filled from the back to the front. Overfill the joints slightly.
- Tooling: Allow the grout to set up until it is firm to the touch (the “thumbprint hard” stage). Then, use a striking tool or a piece of 1/2-inch copper tubing to press the grout firmly into the joint, compressing it and sealing the edges. This crucial step removes air pockets and ensures a watertight seal.
- Final Brushing: Once the grout has cured further and is crumbly, use a stiff, dry-bristle brush to whisk away excess grout from the face of the stone.
Critical Warning: Never use a wet sponge to clean sanded grout off stone veneer. This will create a “cement haze” of grey mortar over the stone face that is incredibly difficult to clean later.
Phase 6: Cleaning and Sealing for Long-Term Durability
Your new stone wall is installed. The final steps are protecting your investment.
Final Cleaning
- Efflorescence Removal: After the mortar has cured for several weeks, you may notice a white, powdery substance leaching from the stone. This is efflorescence—natural salts migrating to the surface. In most cases, it can be removed by dry-brushing with a stiff bristle brush. If necessary, use a mild, manufacturer-approved efflorescence cleaner.
- Avoid Acids: Never use muriatic acid or harsh acid-based cleaners on manufactured stone veneer. It will etch the surface and ruin the color.
Sealing the Stone Veneer
While manufactured stone is durable, sealing it is highly recommended for longevity, especially in New York’s variable climate or in interior applications near food prep or fireplaces.
- Wait for Full Cure: Wait at least 28 days for the mortar and grout to cure completely before sealing.
- Choose a Breathable Sealer: Use a high-quality, penetrating, breathable silane-siloxane or acrylic-based masonry sealer. Do not use a film-forming sealer (like a wet-look lacquer), as this traps moisture inside the stone and can lead to spalling (flaking) during freeze-thaw cycles.
- Application: Apply the sealer according to the manufacturer’s instructions using a pump sprayer or a roller. Ensure even coverage.
Conclusion: A Lasting Transformation
Installing stone veneer stacked stone is a highly rewarding project that delivers immediate, professional-grade results. By methodically following the preparation steps, adhering to the full-coverage buttering method, and taking the time to properly sort and cut your stones, you can achieve a stunning focal point that elevates the entire aesthetic of your home.
The techniques outlined in this 2026 guide, supported by the expertise of SK Group NYC Corp, provide the roadmap for success. With patience and attention to detail, you can create a masonry feature that is both beautiful and built to last for decades.
Have Questions? Call Us Now!
+1 (718) 507-7000
We’re here to help quick answers, friendly service, anytime you need!
Contact SK Group NYC
🌐 Website: www.skgroupnyccorp.com
📍 Serving: Manhattan, Brooklyn, Queens, The Bronx, and Staten Island
📍 Address: 87-88 172nd St, Jamaica, New York, NY, United States, New York