
If your stucco walls have started to crack, there’s no need to worry. Cracks in stucco are a common issue, and with the right steps, you can fix them without spending a fortune. In this guide, we’ll show you exactly how to repair stucco cracks from identifying the problem to making a seamless repair and preventing future damage. Whether you’re a homeowner in NYC or anywhere across the U.S., SK Group NYC Corp has put together this step-by-step tutorial to help you protect your walls and restore your home’s curb appeal. Let’s dive in.
Why Stucco Cracks Happen
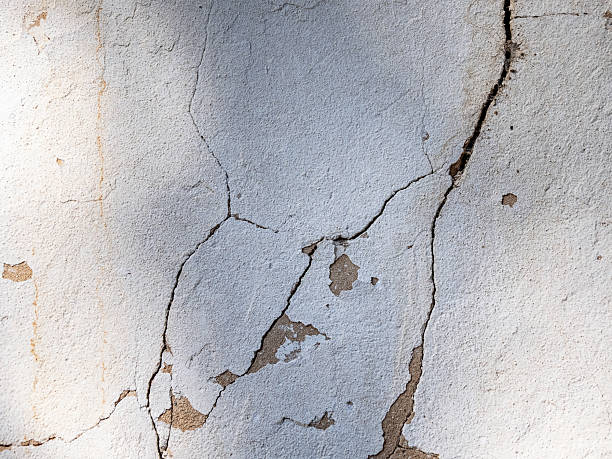
Stucco is durable, but it’s not immune to the stresses of time and environment. Understanding why cracks appear gives you the upper hand in both fixing and preventing them.
Common Causes (Settlement, Moisture, Temperature Changes)
Stucco cracks most often because of movement. Houses settle over years, temperature swings cause expansion and contraction, and moisture can get behind the surface, weakening the bond. Even small shifts can create hairline or larger cracks over time.
Why Ignoring Cracks Makes Things Worse
A small crack might look harmless, but it’s a gateway. Water can sneak in, freeze in winter, or promote mold and rot behind the wall. Fixing cracks early saves money and preserves curb appeal.
Assessing the Damage Before You Start
Before you rush in with patching compound, take a careful look. Not all cracks are the same, and the fix depends on the type and severity.
Types of Stucco Cracks
| Crack Type | Appearance | Repair Difficulty |
|---|---|---|
| Hairline | Thin, less than 1/16″ wide | Easy – usually cosmetic |
| Structural | Wide, often at corners or long spans | Hard – may require professional |
| Spiderweb | Fine, branching pattern | Moderate – surface patch |
| Corner | Along edges or where walls meet | Moderate – needs careful prep |
Knowing your crack type is the first step in how to repair stucco effectively. Hairline cracks are often easy DIY fixes, but structural or recurring cracks might signal deeper issues.
Tools and Materials You’ll Need
Before starting the repair, gather:
-
- Stucco patch or pre-mixed repair compound
-
- Putty knife/trowel
-
- Wire brush
-
- Utility knife or chisel
-
- Bonding agent (if recommended)
-
- Caulk or sealant (for control joints)
-
- Sandpaper or sanding block
-
- Sponge and bucket
-
- Primer (if matching requires)
-
- Paint (to blend if needed)
Preparing the Surface for Repair
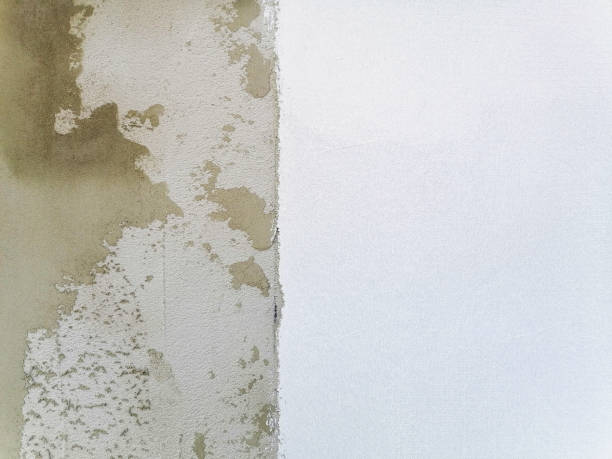
Good prep is 70% of a good repair. Skip this and the patch might fail or stand out.
Cleaning the Crack and Surrounding Area
Use a wire brush to scrub away dust, dirt, and loose particles. Then rinse lightly and let it dry. A clean surface ensures adhesion.
Removing Loose or Damaged Stucco
Widen the crack slightly with a utility knife or chisel to create a clean, stable channel. Undercut the edges a little so the patch can “lock in” rather than just sit on top.
Drying and Priming (When Needed)
If the area is damp or porous, allow it to dry. Some products work better with a bonding agent or primer—especially if you’re patching over older stucco.
How to Repair Stucco Cracks Step by Step
Now the real work. Here’s how to repair stucco cracks properly in five manageable steps.
Step 1: Widening and Undercutting the Crack
Use a utility knife or small chisel to open the crack to about 1/4 inch wide and create a slight undercut. This gives the patch material something to grab onto. Don’t make it massive—just enough for mechanical bond.
Step 2: Applying Bonding Agent or Primer
If your patch compound instructions call for it, apply a bonding agent into the crack. This improves adhesion, especially on old or dusty stucco.
Step 3: Filling the Crack with Stucco Patch
Using a putty knife or trowel, press the stucco patch into the crack, filling it fully. Work in layers if the crack is deep. Smooth each layer slightly and let it partially set before adding the next. Overfill a little so you can shape it.
Step 4: Smoothing and Texturing to Match Existing Finish
This is where it either looks DIY or professional. While the patch is still workable, use a damp sponge, brush, or specialty tool to mimic the existing texture. Practice on a scrap piece if needed. Blend edges so the patch doesn’t look like a square blob.
Step 5: Curing and Sealing
Let the repair cure as per the product instructions. Avoid fast drying mist lightly if the instructions suggest. Once cured, you can paint or seal it to match the rest of the wall, helping with color continuity and added protection.
Tips for Matching Texture and Color
A good repair disappears when it matches. Here’s how to get close.
DIY Texture Blending Tricks
Use whatever tool created your original texture: a sponge for a soft knockdown, a brush for swirl, or a small plastic bag to dab. Work quickly before the patch sets. Feather the edges.
When to Call in a Pro for Color Match
If your stucco is faded, layered with grime, or the original color has weathered, a perfect match by eye is tough. Professionals can do color sampling or spray blending that’s nearly invisible.
Preventing Future Stucco Cracks
Fixing is one thing. Stopping new cracks is what saves you time later.
Proper Drainage and Water Management
Water pooling near stucco weakens the substrate. Make sure gutters, downspouts, and grading move water away from walls. Flashing should be intact around windows and openings.
Controlling Thermal Movement
Stucco expands and contracts with temperature. Control joints (installed during original application) relieve stress; if you’re patching large areas, respect those lines. Avoid rigid attachments that restrict movement.
Routine Maintenance Checklist
-
- Inspect for new hairline cracks every 6 months
-
- Clean surfaces to prevent mold buildup
-
- Check sealants around windows/doors
-
- Repaint or reseal as needed to keep surface protected
Common Mistakes to Avoid in Stucco Crack Repair
Even with good intentions, people slip up. Here’s what to watch out for.
Overfilling or Underfilling
Too much patch spills and looks sloppy; too little won’t hold. Fill properly, then shape.
Skipping Surface Prep
If debris, dust, or loose material remains, the patch will peel or crack again. Always clean and undercut.
Using Wrong Products for Your Stucco Type
Stucco mixes vary (e.g., one-coat vs. traditional three-coat). Match your repair compound to the existing system. If unsure, test a small spot.
Cost and Time Expectations for DIY Stucco Repair
Knowing what you’re signing up for helps you plan.
Small hairline to 1/4″ cracks: 1–2 hours including prep, patching, and texture.
Curing adds a day or two before final seal/paint.
Larger or multiple cracks might need a weekend project.
When “How to Repair Stucco” Becomes “Call a Professional”
Some situations outgrow DIY.
Signs the Damage Is Structural or Extensive
-
- Cracks wider than 1/4 inch or zigzag through multiple surfaces
-
- Separation at corners or around windows/doors
-
- Repeated cracks in same spot after repair
-
- Bulging or soft areas behind stucco
These may signal foundation shifts, water intrusion behind the wall, or unstable substrate.
How SKGroupNYCCorp Can Help
If your stucco damage is beyond a small patch, SK Group NYC Corp offers expert assessment, proper structural repair, professional color and texture match, and long-term warranty options. We handle everything from localized crack repair to full wall restoration in NYC and surrounding areas, so you can get back to a worry-free, beautiful exterior.
Bonus: Quick Fixes vs. Long-Term Solutions
Putting a dab of caulk on a crack is tempting, but that’s a band-aid. Real stucco crack repair the kind that lasts—involves proper prep, patching, and matching. Quick fixes might hide the problem briefly but often lead to repeat work. Think long-term: fix it right once, or keep patching the same spot forever
Frequently Asked Questions
Curing usually takes 24–72 hours depending on temperature and humidity; some products recommend misting and keeping the area moist for the first day to prevent premature drying.
It’s best to repair when temperatures are above 50°F and dry. Rain can interfere with adhesion and curing; if you must do it, use plastic sheeting to protect the area and follow manufacturer guidelines.
Hairline cracks are very thin, often cosmetic, and usually caused by shrinkage. Structural cracks are wider, may shift over time, and could indicate movement in the foundation or framing these often need professional evaluation.
To blend the repair and protect it, yes. Repainting or sealing helps match color and adds a layer against moisture. Use matching exterior-grade stucco paint.
Maintain proper drainage, avoid trapping moisture near walls, respect expansion/control joints, and inspect regularly. Address small issues early before they grow.
Conclusion
Fixing stucco cracks doesn’t have to be a mystery. When you understand how to repair stucco from identifying the crack type, prepping the surface, applying the right materials, to matching texture you can tackle most small to medium repairs yourself. Do the job with patience, avoid shortcuts, and you’ll protect your home’s appearance and structure. For anything beyond DIY scope, SK Group NYC Corp is ready to step in with professional-grade solutions that last.
Have Questions? Call Us Now!
+1 (718) 507-7000
We’re here to help quick answers, friendly service, anytime you need!
Contact SK Group NYC Website: www.skgroupnyccorp.com
 Serving: Manhattan, Brooklyn, Queens, The Bronx, and Staten Island Address: 87-88 172nd St, Jamaica, New York, NY, United States, New York