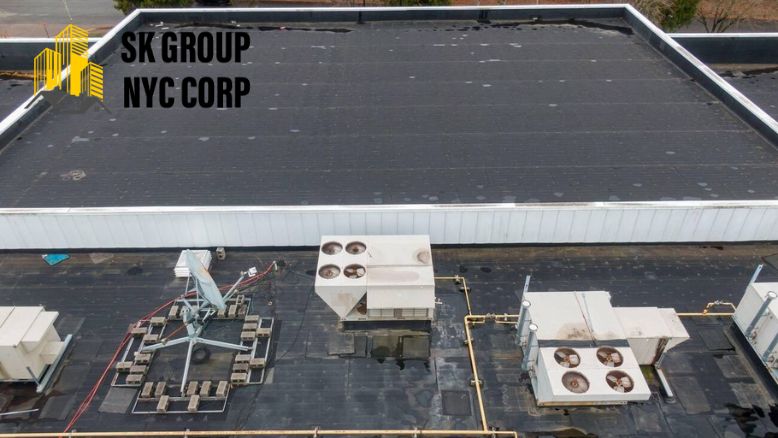
When it comes to keeping NYC buildings strong and energy-efficient, TPO roofing installation stands out as one of the smartest investments. At SK Group NYC Corp, we’ve seen firsthand how this durable roofing system helps property owners save money, improve insulation, and protect their buildings for decades.
Let’s walk you through how TPO roofing installation works and why it’s become a top roofing choice across New York City.
Table of Contents
What Is TPO Roofing?
TPO, or Thermoplastic Olefin, is a single-ply roofing membrane made from rubber and plastic materials. It’s designed to provide long-lasting protection, UV resistance, and energy efficiency.
In simple words, TPO roofing keeps your building cooler in summer, warmer in winter, and helps reduce your energy bills a big plus for NYC’s mixed weather conditions.
Step-by-Step TPO Roofing Installation Process
Installing TPO roofing isn’t just about laying down a sheet it’s a professional process that ensures durability and leak-proof protection. Here’s how experts do it:
1. Roof Preparation & Inspection
First, roofers inspect your existing roof. They remove old materials, repair damages, and clean the surface to make sure it’s ready for a new layer. A clean and level surface is key for a smooth installation.
2. Installing Insulation Boards
Next, insulation boards are laid over the roof deck. These help control the building’s temperature, reduce heat transfer, and make your property more energy-efficient perfect for NYC’s extreme summers and cold winters.
3. Rolling Out the TPO Membrane
Large TPO sheets are rolled out across the roof. The roofing team carefully aligns them to prevent wrinkles and ensure an even surface.
4. Securing the Membrane
There are three main methods used:
- Mechanical Fastening — using screws and plates along seams.
- Adhesive Application — gluing the membrane to the surface.
- Ballasted System — using gravel or pavers to hold it in place (less common for commercial roofs).
5. Heat-Welding the Seams
This is the magic step. Roofers use a special heat gun to weld the seams together, melting the edges so they bond into one solid piece. The result? A watertight seal that prevents leaks even during heavy NYC rains.
6. Flashing and Detailing
TPO membranes are shaped around vents, drains, and edges, then heat-welded again to ensure no weak spots remain. This detailing ensures your roof stays sealed and strong.
7. Final Inspection and Cleanup
Before finishing, the roof is inspected for any gaps, loose seams, or missed spots. Once approved, the crew cleans up, leaving your roof looking neat and ready to perform for years.
Why TPO Roofing Is Perfect for NYC Buildings
TPO roofing offers benefits that make it ideal for New York’s environment and energy goals:
Energy Efficient: Reflects sunlight and keeps interiors cool.
Cost-Effective: Lower installation and maintenance costs than other roofing systems.
Durable: Resists tears, mold, and UV damage.
Eco-Friendly: 100% recyclable material.
Long Lifespan: Can last over 20 years with proper care.
With the city’s push toward greener, more energy-efficient buildings, TPO roofing installation perfectly aligns with NYC’s sustainability goals for 2026 and beyond.
Pro Tips for TPO Roofing Installation
If you’re considering TPO roofing, keep these expert tips in mind:
- Always hire certified roofing contractors incorrect installation can cause leaks.
- Schedule regular inspections twice a year to extend roof life.
- Clean your roof surface annually to prevent dirt buildup and maintain reflectivity.
Why Choose SK Group NYC Corp for TPO Roofing Installation?
At SK Group NYC Corp, we specialize in TPO roofing installation, repair, and replacement across all five NYC boroughs. Our licensed roofing experts use top-quality materials and advanced techniques to ensure every roof is safe, sealed, and energy-efficient.
Whether you manage a small retail space or a large commercial building, we’ll help you choose the best roofing solution for long-term performance and savings.
👉 Visit our roofing service page: SK Group NYC Corp Trusted Roofing Contractors NYC
Final Thoughts
TPO roofing installation is more than just a modern trend it’s a smart, sustainable investment for NYC property owners. It protects your building, reduces energy costs, and keeps your property looking professional for years.
If you’re planning a new roofing project, let SK Group NYC Corp handle it. We’ll make sure your TPO roof is installed perfectly, built to last, and ready to face NYC’s toughest weather conditions.
Have Questions? Call Us Now!
+1 (718) 507-7000
We’re here to help quick answers, friendly service, anytime you need!
Contact SK Group NYC
🌐 Website: www.skgroupnyccorp.com
📍 Serving: Manhattan, Brooklyn, Queens, The Bronx, and Staten Island
📍 Address: 87-88 172nd St, Jamaica, New York, NY, United States, New York

